Showing posts with label bunting. Show all posts

Thursday, October 31, 2013

Bunting for our wild man

On our first day in Bega, just over 2 years ago, Olive and I did all the normal things you do after you move to a new town where you don't know anyone. We visited our land, we visited the op shops, and we visited the local food co-op. At the co-op, we got chatting to a lovely and friendly chap who has, in the ensuing 2 years, come to occupy an important place in our lives. 

He was absolutely instrumental in helping us finish our house so we could move in (if you want to read about these adventures, check out pretty much any post from May, June or July last year). He supplies us with firewood (in exchange for an extended loan of my dad's chainsaw). He regularly joins us for dinner, brings us rabbits, gives excellent hugs, and is generally adored by all members of our family. And, if that's all not enough, Rohan Anderson referred to him as our "geologist turned wild man, Brett". Love it.
Brett, Oscar, some strawbales and a big pile of clay mud, circa June 2012. Photo by Olive

Last Christmas, I gave Brett some bunting for his caravan, which he said reminded him of "the goofy greeting smile of a magical monster with unequal and colourful teeth".

When Brett recently built his most excellent composting dunny/glasshouse/seed-raising shed (aka the Turd Temple), it was just crying out for some monster teeth to complete the forth face.
Brett's Turd Temple in all its grinning glory
And so it was with a great deal of pleasure that I sewed up some more teeth bunting for our friend Brett, our first friend in the Valley.


Bunting cradles the view north to Mt Murrabrine and Brett's fancy new water tank.

Tuesday, October 8, 2013

Candelo skirts for sale!

On sunday Gab and I spent a lovely, sunny day at the Candelo Markets. I was selling skirts, doily and teatowel bunting and crocheted stubby holders, and Gab was selling her beautiful recycled silver jewellery and the most adorable, colourful recycled leather wallets of all time. The skirt she's wearing in this picture (it has chickens on it!) was a trade for a spunky broad-bean-green leather wallet for Pearl.
For those of you who can't make it to Candelo for the markets, I thought I'd post some skirts on here so you can have a virtual market experience. Also, I'm selling my market skirts for a mere 50 bucks, so they're something of a bargain!

So have a stroll around our stall! If you see something that tickles your fancy, send me an email, or leave a comment, and I'll post it to you! Remember that the wrap 'n go skirts are made from a vintage 70s skirt pattern, and are quite flexible in their sizing, so I've just given a general ball-park size. They can be smaller or bigger, depending how much you've eaten for lunch...

Have fun!
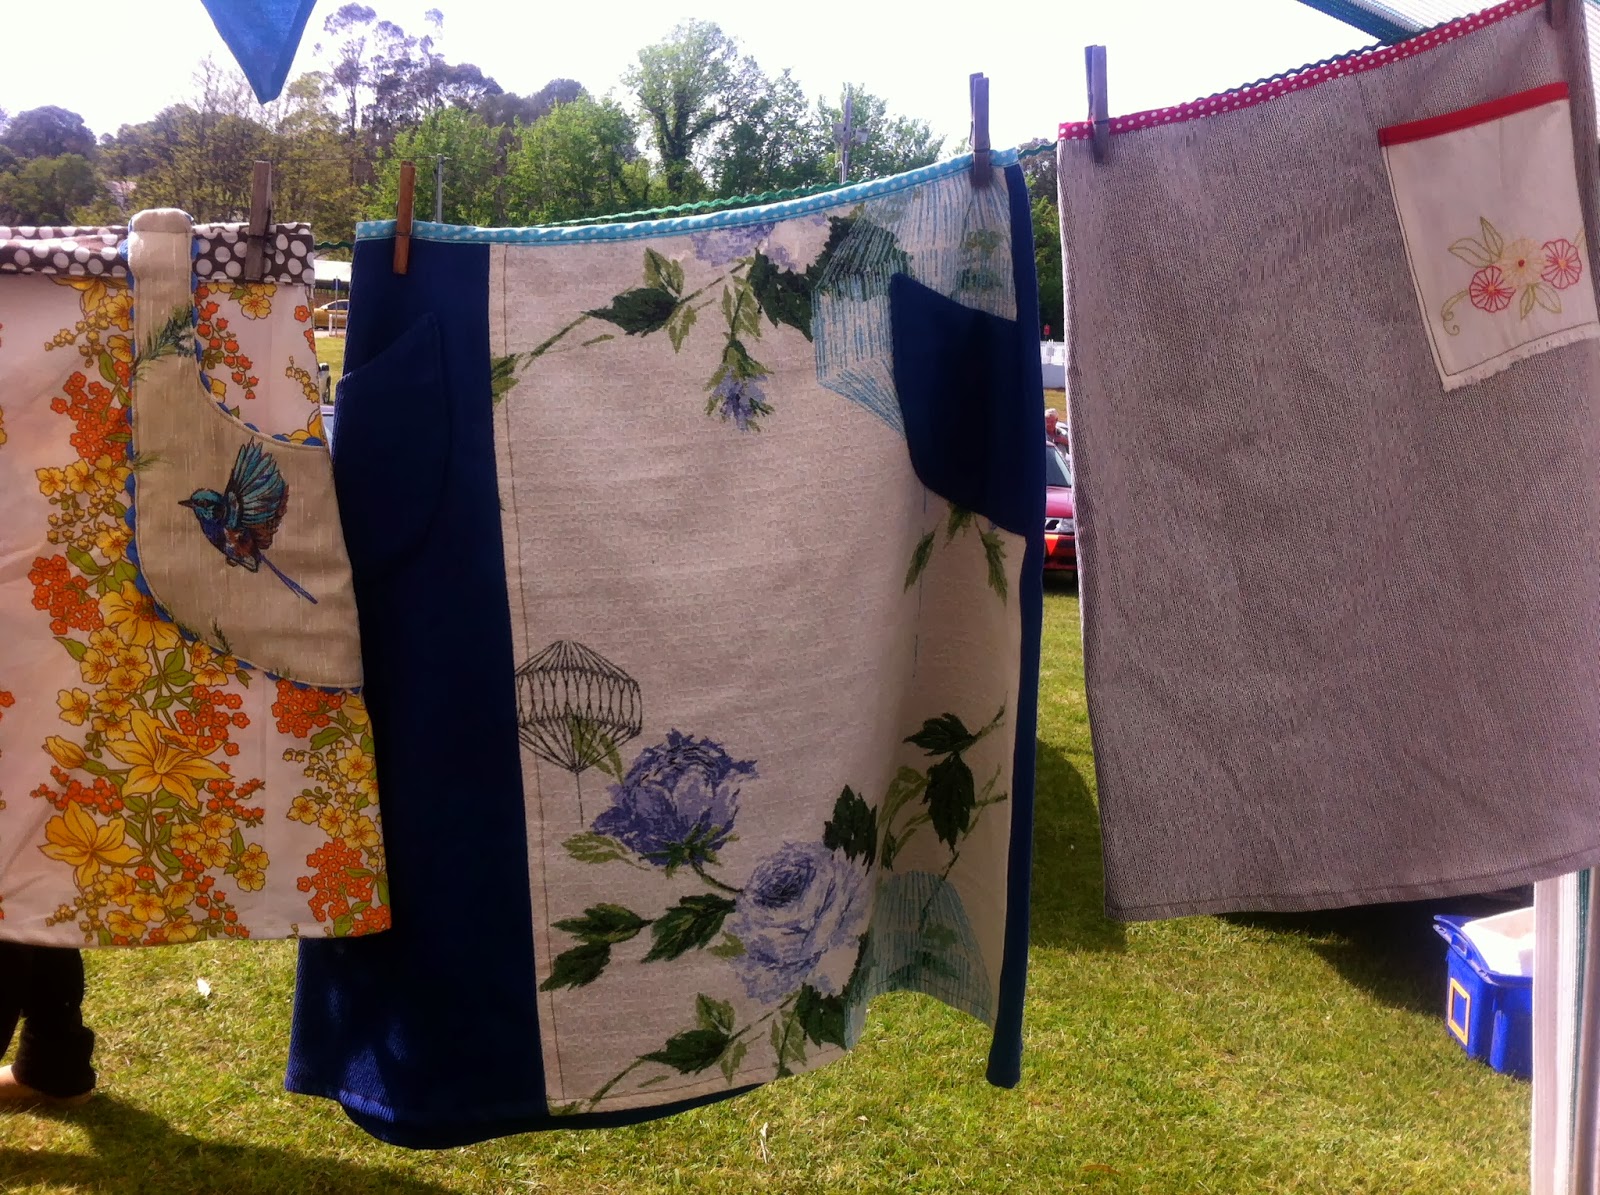
L-R: detail of blue-wren skirt pocket; vintage rose print barkcloth skirt with blue polka-dot waist band and pockets (size 14); stretchy pin-stripe skirt with vintage embroidery pocket and red polka-dot waist band (size 12)
Brown cornflower-print teatowel and polka-dot wrap 'n go (size 14-16); orange and yellow floral wrap 'n go with blue wren and rick-rack pocket (size 12-14); blue barkcloth gorgeousness...
vintage floral print drill with contrast pockets (size 14); more of the brown cornflower print (it is BEAUTIFUL...)
crocheted stubby holders, $12 each

embroidered black swan (with babies!) pocket on blue drill (size 14-16)
Vintage pink floral print A-line with embroidered pockets (size 10)

vintage blue and red floral print A-line with vintage kids' print pockets (it's a little hiking person and green trees on a red and white polka-dot background) (size 14); vintage pink floral print bolero (size 14) and doily bunting, $15.

Saturday, August 31, 2013

To market, to market

embroidered-black-swan-pouch-pockets on the make
Back in the day (that would be the day before we had 2 kids) we used to pack the car early on saturday morning and head off to the Addison Rd Markets to hawk my wares. It was a fun, social occasion, involving visits from friends, Malaysian street food for breakfast, chinese dumplings for lunch, and many treats in between. Occasionally we even made some money!
bunting and t-blouses
When Oski was born, though, we very quickly realised that doing markets with a toddler and a baby was just going to be a bit stressful and potentially un-fun, so we gave it a miss. And haven't had a stall at a market since.
Australiana bunting on the make
skirts with hip-koalas
But this past week has seen a flurry of sewing activity, as I prepare for a shared stall with RedPeg at the very lovely Candelo Markets. There'll be all kinds of P&E, including crocheted stubby holders and bunting and handmade cards, and you can get some recycled silver jewellery to boot!
crocheted stubby holders galore!
So if you're in the area, and feel like getting yourself a springy P&E and some accessories on the first day of spring (yay!) come to the Candelo Markets and visit us tomorrow. All skirts fifty bucks!!! Tell your friends!!


Monday, August 12, 2013

Why not make some cute cake bunting?

For me, vake decorating is just another kind of craft. A delicious craft, let's say.
For Olive's birthday I decided to make some mini cake bunting, inspired by a picture I saw in an awesome book called Happy Home
Turns out the bunting is really fun and easy to make, and I believe I will be making quite a bit more of it in the future. It's so cute and easy, I thought I'd share my method, so you can make some too!

First of all, gather your equipment: 
* Fabric scraps cut into triangles (or squares or whatever). I pinked mine across the top so that it wouldn't fray, and also so it was a similar shape to the ric rac. 
* You'll also  need some 1cm wide strips, about 20cm long. 
* A number of bamboo skewers
* Some ric rac or ribbon
* craft glue, hot glue, or double-sided craft tape (I used the latter)

How to:
* Sew along your ribbon or ric rac using straight stitch on your sewing machine, laying the triangles (or squares) underneath. I made mine in lengths of 4 flags, but you can do as many as you want, I suppose.
I left 'tails' at each end, which you can see here.
The tails are so you can attach your flags to the 'flag poles'. 
* Put a little bit of glue or a small length of double-sided tape at the top of the skewer. Glue the 'tail' of your flags to the top of a skewer, and then wind one of your skinny strips of fabric around and around until the tail of the flags and most of the skewer is all nicely covered with fabric. I left about 3cm at the pointy end of the skewer uncovered, so I could stick it into the cake.
* Then take the other 'tail' of that length of flags, and join it in the same way to another skewer. This will give you 1 length of flags with a skewer at each end. 

I actually attached the 'tails' 2 at a time to each skewer, so I could put the flags all around the cake (hopefully that makes sense from the picture).


We were all pretty happy with how cute it all turned out, and I'm pretty sure the flags will be making appearances in some fairy gardens into the future.

Hip hip hooray for reusable, DIY cake craft!!


Thursday, November 8, 2012

Dear Pump up the Dam supporters...

Thank you all for your patience, and thank you for supporting sun-powered hand-made!
Even though our solar system was actually installed some weeks ago now, we haven't really been able to use it yet on account of an unfortunate incident involving a food processor and an inverter. The problem has been remedied now, however, and I have been in a happy sewing frenzy. In fact, the first lot of Pump up the Dam goodies were posted today, including, but not limited to...
a vintage floral bolero for Meg

A not-too-flared-out rosey-print for Beth

Some classic 70s greens and a couple of lorikeets for Siggy


A 70s bonsai print bark-cloth bolero for Alexis (who is also the recipient of other associated package 4 goodies which refused to be photographed in any constructive kind of way)

A quite-beautiful big flowery teatowel pocket on some navy striped mattress-ticking for Meg

A package number 4, including doily bunting, preserved lemons and gorgeously-gorgeous yellow-y sunny print bolero and skirt (with a deer-print pocket!) for Katherine

And a beautiful pink-and-purple rosey print skirt for Siggy as well.

I had fun, and hope you have fun wearing your goodies. It was nice to get reacquainted with my fabric and teatowel collections. It was nice to sit outside in the evening air, chatting with Pearlie and taking in the view as I pottered along. I felt so happy knowing that I could use my own hands to make these goodies to sell to you kind folks, so that we can buy the little pieces of infrastructure we need to make this tiny-farming adventure of ours a little easier. I felt grateful to all of you for taking a moment to think a little about positive ways to spend your money, so that your hard-earned bucks can go towards a little positive change in the world, and not just line the pockets of a greedy chain-store owner who makes clothes that rip off the makers, consumers and our poor old beleaguered planet.

Thank you all. I feel humbled and honoured to be able to sew like this, just a little, sometimes, when the need and desire arises. I do hope you enjoy wearing your gear.

To those of you still waiting, there is more coming, soon. I promise. We've almost reached our goal, so tell your friends that if they're quick I can still make a couple more packages for this sale of ours. Or, if you're happy with what you get, you can buy one for a friend as a Christmas-time gift. Trust me - it'll be a gift that keeps on giving, and I promise to think of each and every one of you and your lovely skirts every time I don't have to haul water by hand.

You rock.

x annie

PS. I have to say a special in-particular thank you to Katherine for giving me the go-ahead to use yellow. It's not a very commonly-requested colour, but it's one that I absolutely adore. The combination of not-commonly-requested and I-totally-love-it-but-am-kind-of-irrationally-scared-to-wear-it-myself-even-though-I-freaking-love-it means that I have a LOT of very beautiful yellow-toned fabrics that don't get a lot of play. I have to say, Katherine, that I absolutely and positively sewed your package vicariously for myself, and I loved every minute of it. I hope you love it all too. Especially the deer...

Sunday, January 30, 2011

A lovey kind of glow


It's sunday afternoon and I'm munching organic corn chips and home-made guacamole from a beautiful mint green Fowler Ware bowl. Yesterday, we went to a most incredibly gorgeous wedding, and I just now finished sewing a dress and some skirts. It's warm, the cicadas are singing, and the kids are playing in bowls of water on the verandah. I'm feelin' good.

So. The wedding. Megan and Ben. BEAUTIFUL!!! It was all so full of home-grown, heartfelt, organic goodness, you could feel the love with all your senses. It was outside on the grass, barefooted, kind of like a love picnic. It was an honour to have provided little bit of somethin' somethin', in the form of bunting, to contribute to the loveliness.


In the wake of the embroidered pillow slips I made for Alex and James a few months back, I thought that another love embroidery was in order for Megan and Ben. I was inspired by a little bit of braid that's been kicking around in my family since I was a little kid, which depicts a couple of German folk-art people having a smooch. I absolutely LOVE it, and wanted to recreate it for a cushion. When I got to drawing up the design though, I thought "Why not make it actually Megan and Ben, instead of these random German dudes?". I was also inspired by my friend Jay's Christmas present to us, which was an outrageous little thing too tiny to photograph, so let me just say that it involved the most precious embroidered family portraits that are literally too cute for words. So I drew together all the little beauties floating around in my head, and came up with this. I reckon they're pretty cute!


The tree fabric is a total winner from Alewives called Majestic Oak. Stunning. And perfect because the bride and groom are outdoorsy types, so I reckon the frame is like they're out walking in the woods, holding on to their flower-sprouting German folk-art Love. As you do.

You can't really see it in the photo, but in the seam of the cushion I sewed some yellow rick-rack. Rick-rack is something I've always thought of as as being exceptionally cool, but have, weirdly, not used it that often. Well, I think the cushion has changed that. I can feel a complete rick-rack bender coming on, beginning with the waist band on the custom wrap skirt I finished this afternoon. The colour brief was "green, or with green in it". Unlike the last time I had a 'green' skirt order, when I was, for some inexplicable reason, totally devoid of green fabrics, I had in my possession this time round an excellent sheet which Pearl had picked up at an op-shop in Bega. Hooray!


Also on order was a dress made out of a sheet (gotta love 'em), which is outrageously cool. The request was for a dress with contrasting sleeves and belt. I have to admit, I was a little apprehensive about this set-up, not sure that it was going to work. When I finished the dress, however, all doubts were allayed. I'm stoked!


The third item in this trio of customised-ness was a remake of a dress which was 'not quite right'. This was really fun, given the outrageous level of cuteness contained in the vintage donkey fabric I used for the pockets. Unbelievable.


Ah. The goodness. And now dinner's ready. A mostly-home-grown frittata. Like I say, I'm feelin' good. And why not, right? As long as there's love, vintage donkeys and home-grown produce in the world, there's gotta be something to smile about.

Thursday, January 20, 2011

Birthday bunting and wedding frock beginnings

After my post about Megan's wedding doily bunting, I received a request for some personalised birthday bunting for a little boy called Louis who is turning 2! I reckon a birthday's almost as good as a wedding (actually, probably even better because you get to have one every year) so I was SUPER excited to get started on the flags for the little guy. As I mentioned in my other post, birthday bunting is an excellent and fun tradition. Unlike Christmas, which sees the same familiar and well-loved decorations making their annual display, birthdays don't usually have the same kind of 'festive' feeling. Enter Birthday Bunting, and you have yourself an instantly recognisable decoration which comes out every year to wish you (or your kids, pets, whatever) a happy birthday. Lovely. And I reckon you don't even need sewing skills to update the number each year, just cutting skills and maybe blu-tacking, double-sided sticky-taping or perhaps, for the punk-rockers amongst us, safety-pinning skills.

I also like making bunting because it makes excellent use of pieces of leftover fabric that are too big to chuck out, but too small to make anything much out of.

A few months ago I posted pictures of a bunch of fabrics that were finalists to be chosen as the obi waist band on a wedding dress I'm lucky enough to be making. Well, a choice was made, which led to the even funner choices of picking the co-ordinates. And here they are!

The bride in question is a woman after my own heart - she loves bright colours. In fact, she loves them so much that the first shade of green I picked out was too light! But with the help of some online colour palettes I think (hope!) it's all sorted now. I'm pretty much in love with the colour combo - pink + green = awesome in my books.

The style is to be a 50s-era halter dress, with a circle skirt and petticoat (hence the netting), with an obi-style belt similar to the one I made for Ally. How great! It's a beach wedding, and I reckon this dress is going to be super-cute in the sand.

Sunday, January 9, 2011

Doily bunting to celebrate the wedding of the year!


As you may know, I love weddings. Massive sucker for weddings, right here. In fact, if I wasn't a bush regenerator/environmental educator/clothes designer-maker/part-time academic, I'd be a wedding planner for sure. I love making wedding dresses, and when I don't get to make the dress, as in the case of my friend Megan, who is eminently competent in the frock-making department, I lend my crafty skills in other ways, like making doily bunting!


Originally Megan asked for "a few metres" to jazz up the house where she's to wed her beloved bearded bloke. But a few op-shop encounters in Bega, Narooma and Unanderra left me with a massive amount of doilies so I went to town and racked up more like a kilometre. OK, so that may be a bit of an exaggeration, but let's just say there's plenty.


I first started making bunting when Olive turned one, and I made a Happy 1st Birthday Olive bunting. We change the number every year, so it's become something of a tradition. Then I started making name bunting for a little shop in Surry Hills. People would let me know their kid's name and I'd make up a set of flags for them. I recently also had the pleasure of making the name bunting for Georgie Love's stint and Melbourne Finders Keepers.


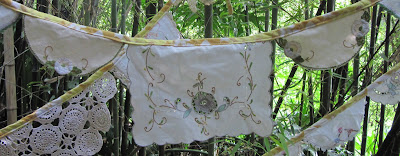
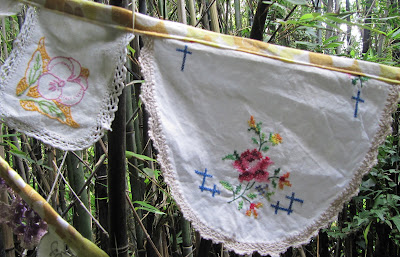
And then at Christmas I made a few strings of bunting made from the bajillion doilies I've collected over the years. As many of you keen op-shoppers/crafters will know, doilies are out there, sometimes extremely beautiful, but not that useful. Megan was one of the lucky recipients of the Christmas lot and was quite partial to them, so I offered my services as official wedding bunting maker. Fun times! I can't WAIT to see them in action at the actual festivities (as opposed to the bamboo grove outside my bedroom door)... Now I just have to get started on the gift!

In other news, I received two blog mentions over the hols, which I was pretty excited about, and wrote a blog about here. For some reason it came up in May!! I'm fairly unsophisticated when it comes to computers so I wasn't really surprised.