Showing posts with label re-use. Show all posts

Tuesday, October 8, 2013

Candelo skirts for sale!

On sunday Gab and I spent a lovely, sunny day at the Candelo Markets. I was selling skirts, doily and teatowel bunting and crocheted stubby holders, and Gab was selling her beautiful recycled silver jewellery and the most adorable, colourful recycled leather wallets of all time. The skirt she's wearing in this picture (it has chickens on it!) was a trade for a spunky broad-bean-green leather wallet for Pearl.
For those of you who can't make it to Candelo for the markets, I thought I'd post some skirts on here so you can have a virtual market experience. Also, I'm selling my market skirts for a mere 50 bucks, so they're something of a bargain!

So have a stroll around our stall! If you see something that tickles your fancy, send me an email, or leave a comment, and I'll post it to you! Remember that the wrap 'n go skirts are made from a vintage 70s skirt pattern, and are quite flexible in their sizing, so I've just given a general ball-park size. They can be smaller or bigger, depending how much you've eaten for lunch...

Have fun!
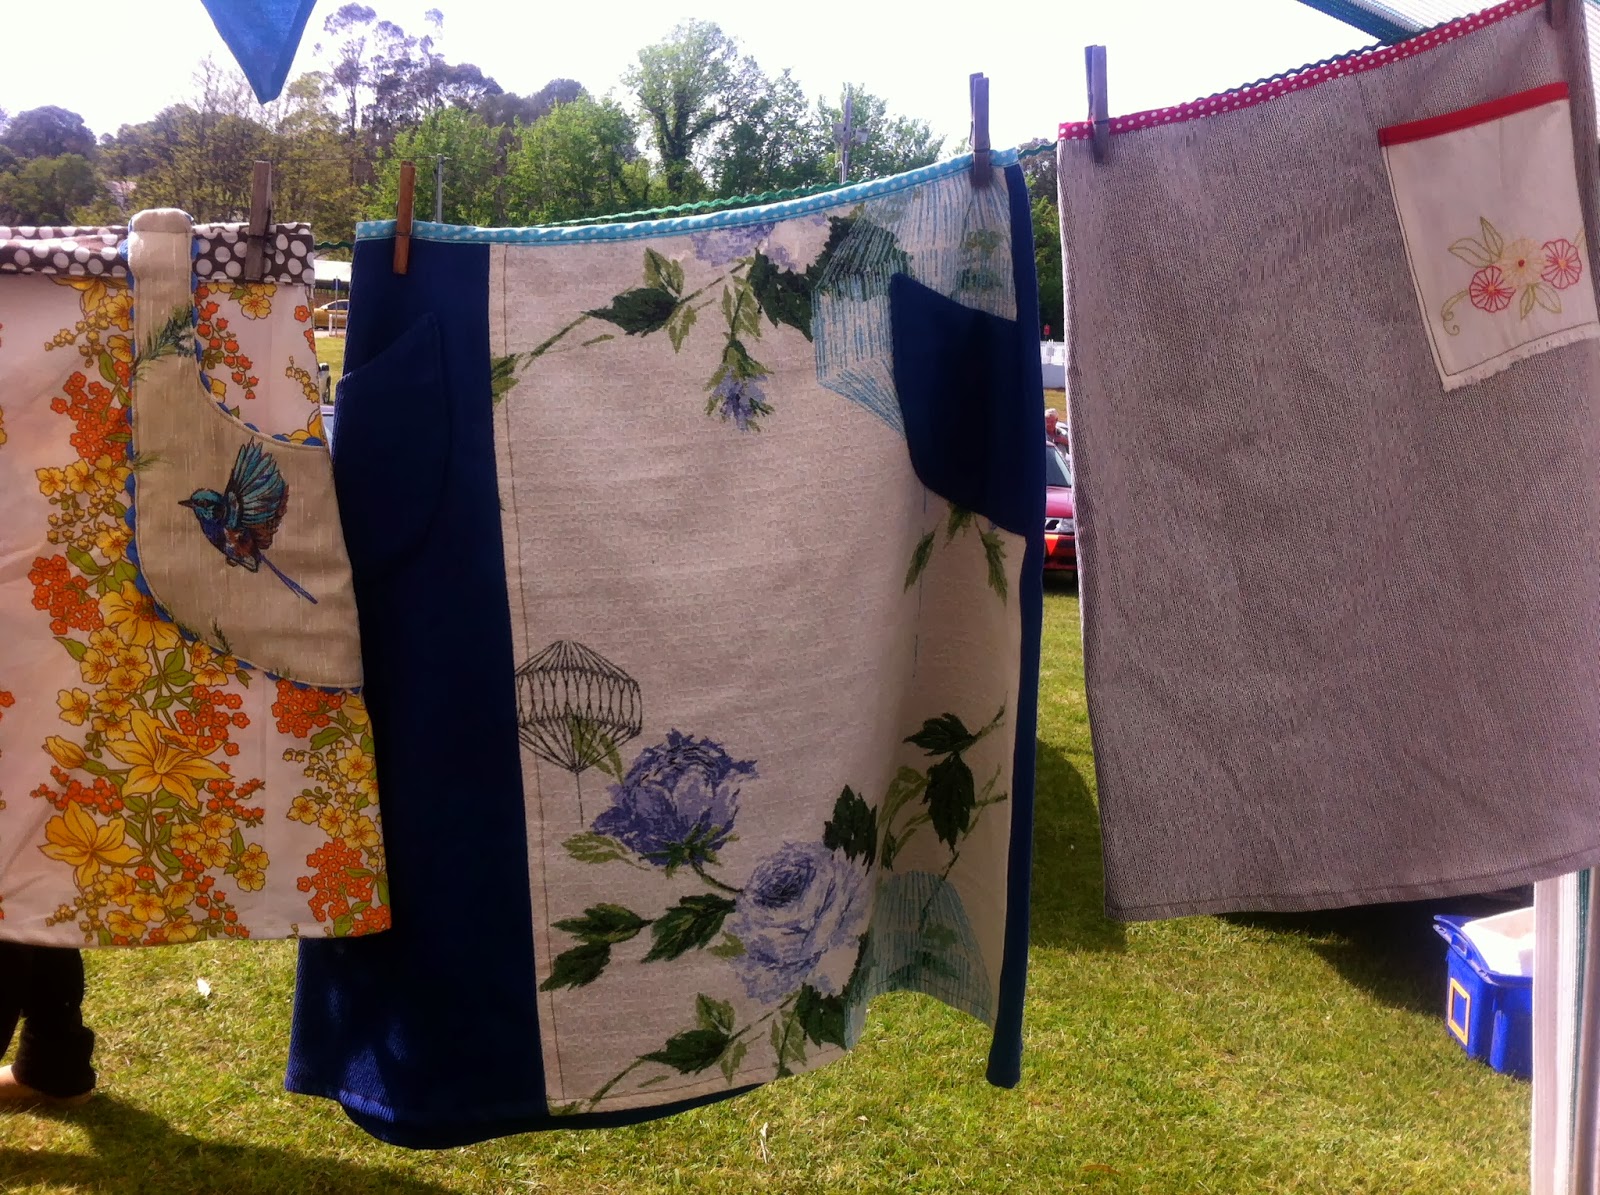
L-R: detail of blue-wren skirt pocket; vintage rose print barkcloth skirt with blue polka-dot waist band and pockets (size 14); stretchy pin-stripe skirt with vintage embroidery pocket and red polka-dot waist band (size 12)
Brown cornflower-print teatowel and polka-dot wrap 'n go (size 14-16); orange and yellow floral wrap 'n go with blue wren and rick-rack pocket (size 12-14); blue barkcloth gorgeousness...
vintage floral print drill with contrast pockets (size 14); more of the brown cornflower print (it is BEAUTIFUL...)
crocheted stubby holders, $12 each

embroidered black swan (with babies!) pocket on blue drill (size 14-16)
Vintage pink floral print A-line with embroidered pockets (size 10)

vintage blue and red floral print A-line with vintage kids' print pockets (it's a little hiking person and green trees on a red and white polka-dot background) (size 14); vintage pink floral print bolero (size 14) and doily bunting, $15.

Saturday, August 31, 2013

To market, to market

embroidered-black-swan-pouch-pockets on the make
Back in the day (that would be the day before we had 2 kids) we used to pack the car early on saturday morning and head off to the Addison Rd Markets to hawk my wares. It was a fun, social occasion, involving visits from friends, Malaysian street food for breakfast, chinese dumplings for lunch, and many treats in between. Occasionally we even made some money!
bunting and t-blouses
When Oski was born, though, we very quickly realised that doing markets with a toddler and a baby was just going to be a bit stressful and potentially un-fun, so we gave it a miss. And haven't had a stall at a market since.
Australiana bunting on the make
skirts with hip-koalas
But this past week has seen a flurry of sewing activity, as I prepare for a shared stall with RedPeg at the very lovely Candelo Markets. There'll be all kinds of P&E, including crocheted stubby holders and bunting and handmade cards, and you can get some recycled silver jewellery to boot!
crocheted stubby holders galore!
So if you're in the area, and feel like getting yourself a springy P&E and some accessories on the first day of spring (yay!) come to the Candelo Markets and visit us tomorrow. All skirts fifty bucks!!! Tell your friends!!


Saturday, August 24, 2013

Our home-made candles (a guest blog post by Olive*)


today we  made candles with lavender and old candle wax in patty pans. One was in a  jar.i made a cat.

first we warmed  the wax next    we poured it in the patty pans.  we plaited string to make a wick. we picked flowers. and put them in the wax. we used  sticks to hold the wicks up while the wax dried. 

they look like cakes. i felt happy.
* all writing and some photos by Olive

Saturday, July 27, 2013

Updates from the teatowel-a-thon

As I think I mentioned before, the teatowel-a-thon is chugging along quite nicely, and we're almost ready to purchase our sausage-making equipment. Yee har! Thanks so much everyone for your orders. It's been really fun to work with you on creating some new things. 
Of course, there have been some old favourites, like this bolero I made for Amy, in Melbourne. Tried and true, the teatowel bolero is always fun, because each teatowel/bias binding combo means that they're all new, and they all have their own character. Yay for handmade character-filled clothes, I say.
I have also had orders for new things, like pinnies and shift dresses, which I've never made before, so enjoyed the challenge of adventuring from my sewing comfort zone.
Quite early on in the sale I got a request for a blanket with Australiana patches. What a cool idea! Strangely, the thought had never crossed my mind before, so was grateful to Jillian for raising the suggestion. Luckily for Jillian and I, my mum had recently been to a garage sale and picked up some brand new, still in their packets 100% wool blankets. They're bloody beautiful, and this green plaid was, I thought, perfect for a spot of Australiana embellishment. I picked out a few choice patches - animals, birds, flowers, and an amazing, embroidered black swan - and got to work.

I don't often sew things this big. I think the last big thing I sewed was a bedspread I made for Pearl a few years ago. So I'd forgotten how tricky it is to get the big thing - in this case a thick, snuggly wool blanket - around the sewing machine. I suppose there are sewing machines especially made for sewing big stuff?? I don't believe mine is one of these, and I find the sewing of big things slightly challenging. But thankfully, not impossible. 
After wrestling with the blanket and the patches for several hours, I spread it out in the sun and admired my handiwork. I was pleased. It reminds me of a scout blanket (in a good way!!). The snuggly green wool and the bright Australiana patches work perfectly together, and I can't wait to see what it looks like on a bed or couch. It'll definitely keep you warm Jillian!

I hope you enjoy your blanket and bolero girls! I certainly enjoyed making them for you.

Saturday, July 6, 2013

Still lives

So far, the teatowel-a-thon has been fab! A nice steady flow of orders, getting us ever-closer to our goal of purchasing a sausage cannon, but not enough to make me overwhelmed, and leaving me time to work on my other projects like rag rugs and crocheted stubby holders and the platform for our wood-fired pizza oven. Balanced. Not insane. Just the way I like it.
And I've had some lovely folks making special requests for various teatowel themes for their boleros/cushion-covers/pinafores and frocks, which has prompted me to look quite thoroughly through my collection to take stock of what I have.

After posting the gorgeous still life last week, and finding a few more choice still lives in the rummagings, I thought it might be nice to do a still life themed post.

But what exactly is the plural of 'still life'? I've gone with still lives,  because I kind of like the thought of lives that are still. Not still in a stagnant, non-moving kind of way (no way! Not that!!), but still in a quiet, peaceful kind of way, if that makes sense...
In one of those kind of fortuitous/spooky/funny coincidence things, when I uploaded the photos I took today of a handful of still life teatowels, I also uploaded some photos from this week that are beautiful little still lives of their own. Just hanging out there on the camera, moments that I just found to be beautiful and so took a photo with no particular plan for them. They both feature goings-on from our big outdoor table. Even now, in (almost) the middle of winter, it's so central to our lives, every single day. It's bathed in sun all day, from the moment the sun comes up til the moment it ducks over the western hill, and I'm particularly in love with sitting out there in the sun stitching up the big coiled rag rug I've been working on for.. well... about 2 years. But that's another story.

The table is also our eating-place and our crafting place and a playing place and a place for the kids to climb up to escape from the neighbour's dog who's threatening to steal their bikkies out of their hands. It's where we wash and tie up our bunches of veggies each week before we take them into town to sell to the co-op. It's where we chop up food and do the dishes, and it's where I cut out and sew whatever clothes I'm working on.

And sometimes things look so beautiful on it (sometimes it just looks plain messy) we just have to take a photo. And I guess that action makes the life of our table be still for just a moment.
The still lives of the teatowels, on the other hand, are waiting to be given a new life! They're waiting to be unfolded, to be cut (sorry Kylie!) and re-made and worn by people who are going to the markets and out to see music and to have tea with friends. These still lives are waiting to be made into cushion covers to decorate and soften couches and sleeping nooks, and to see the light of day once more.
So if you like one, let me know! pearlandelspeth@gmail.com


Sunday, June 30, 2013

The great July vintage teatowel-a-thon

Some time in the last 10 years - I'm not exactly sure when - I got really into collecting teatowels from op-shops. In particular, souvenir teatowels, and in particular particular, Australiana teatowels. I couldn't say exactly what it is about vintage souvenir/Australiana teatowels that attracts me so, but I can say that it has something to do with 1. colourfulness of design, and 2. kitschness of design. Sometimes I make them into things (skirts/pillows/patches/pockets/boleros/serviettes/etc etc), sometimes I don't. Hey, sometimes I even just use them as teatowels! Radical!
'1978' (my year of birth) and 'South Coast of NSW' (our new home-land) teatowel cushions snuggled up on the bothy couch

Recently, I've received some super-awesome teatowel donations from extremo-generous friends. As a result of said donations, ye olde teatowel suitcase is fairly groaning with abundance. It's a beautiful thing, let me tell you, but it makes me want to share.
Just some of the delightful teatowels that could soon be adorning your body and/or house

So, for all of July, I'm going to be posting some photos of a selection of teatowels for perusal by you, dear reader. I won't be selling them as teatowels, as I would love to make things for you - skirts, boleros, sets of cloth serviettes, cushions, etc. Basically, if one of the teatowels you see here tickles your fancy in some way, give me a hoy and I'll make it into something for you.
Calendar teatowels like these make excellent cushions, of the birthday-gift variety. If you're after a particular year, let me know. I have a ton of them...

Examples of some things I've made with teatowels can be seen here, here, and here. Though to be honest, the blog's covered in them so you wouldn't really need to look too far.
Pearl's pick of the week. She's a sucker for a still life involving fruit and/or veg

The money raised during this July-teatowel-a-thon will go towards buying sausage-making and smoking equipment for the pig we have coming in August. The pig, now happily grazing and snouting around a farm in Wyndham, will, in August, be coming to our place to be made into bacon, prosciutto, sausages etc. Sale of teatowel items will fund said pig-processing operation, and will contribute valuable self-sufficiency infrastructure to our little farm. You get vintage teatowel wares, we get homemade nitrate-free bacon and sausages. It's as simple (and good) as that. Think of it as paypal-facilitated bartering.
A pair of never-been-used Great Barrier Reef numbers. I'm thinking boleros...

So if you like the looks of something I post in the next month, send me an email - pearlandelspeth@gmail.com - and we can work something out. I'm looking forward to sewing for y'all!

Wednesday, May 15, 2013

News from the orchard part 2: the quest for a fox-proof chook house

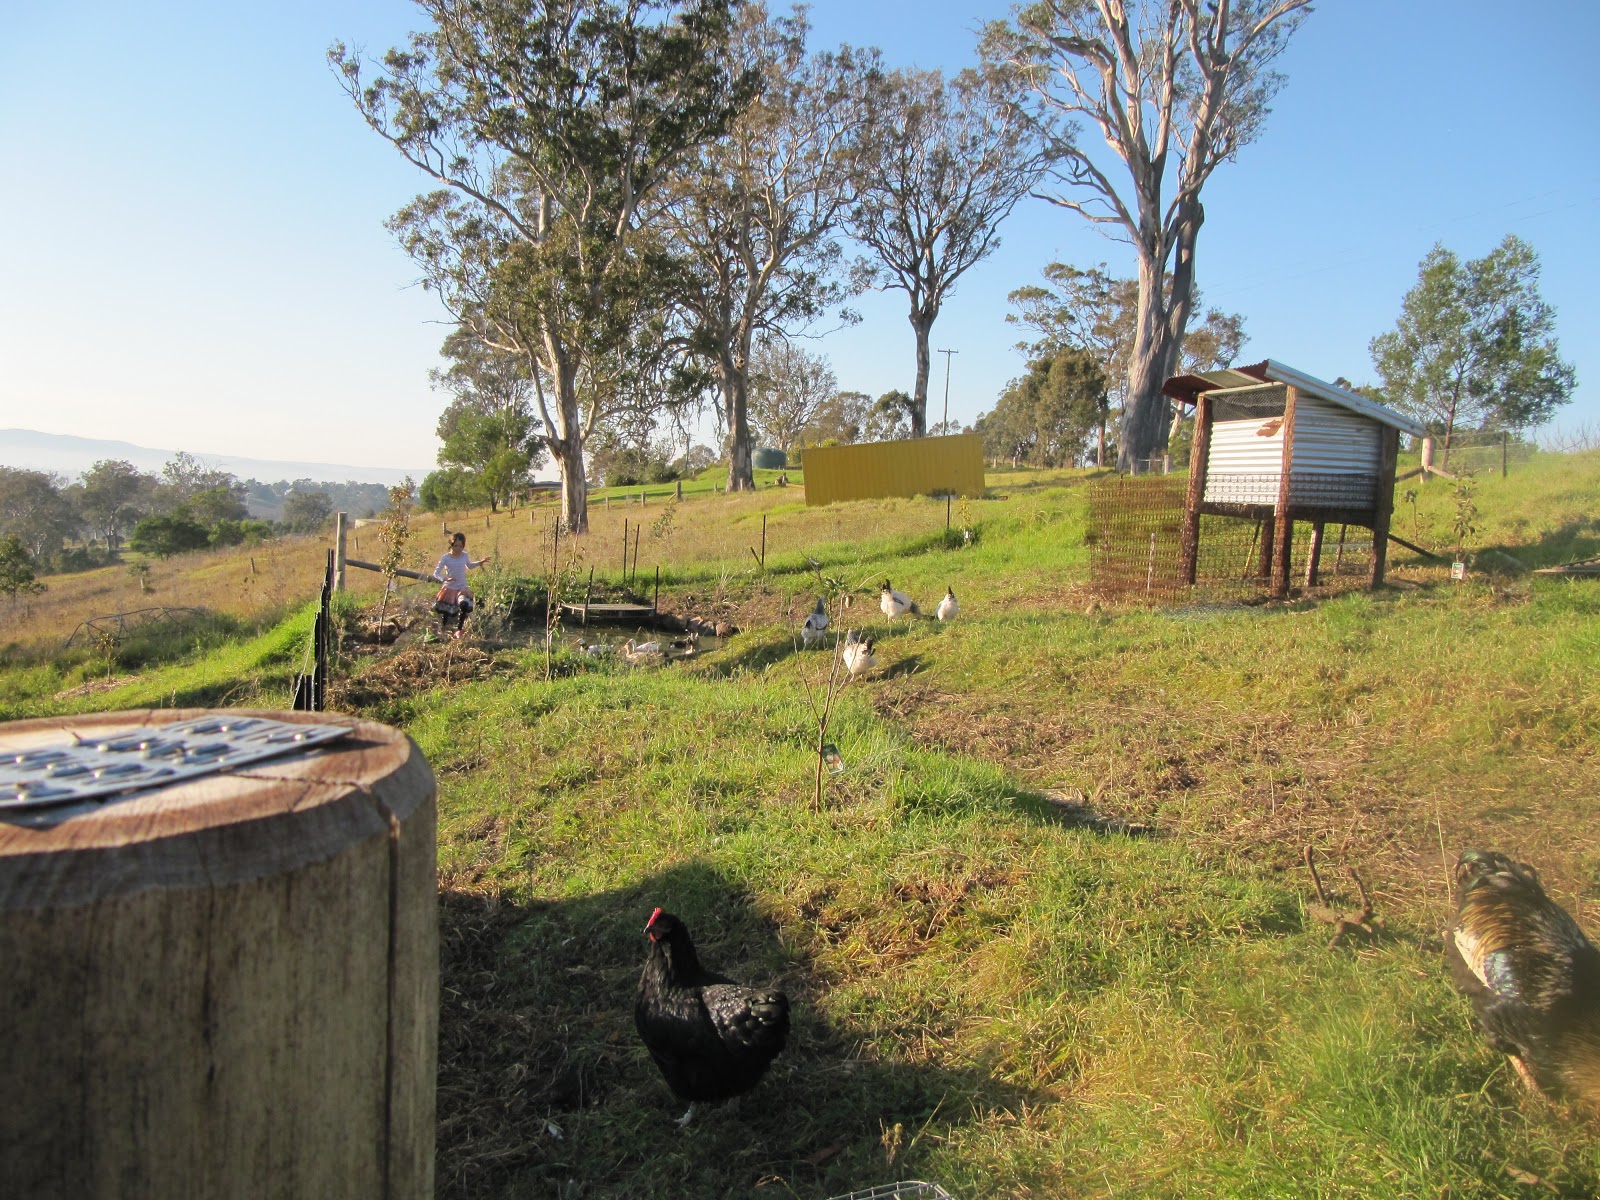
Olive tends her flock - Errol's in the foreground with the glorious orange neck feathers, new 'Fort Choox' chook house behind
Fox-proofing the poultry community on our little farm has proved to be more difficult than we anticipated. When we first got the ducks, I made a dome. It was dodgy as all shit on account of the fact that I used the wrong kind of pipe, but we didn't have any trouble with foxes, though in hindsight I think that had more to do with the fact that our neighbours were baiting because it was lambing season. Just before we got the chooks, we built a snazzy A-frame house, which was, I thought, fox proof. Not so much. We had a few break ins, lost a few chooks, and I even spent one night in the orchard on an inflatable mattress chasing the fox off before I decided that the A-frame had to go. I'd patched it and patched it, and the mongrel fox was still getting in. We needed a new plan, a new design. So I consulted with my ever-helpful and thoughtful friend David, who had become quite interested in our fox-proofing plight (he enjoys a challenge). After many sketches, home-brew sessions and whiteboard-planning meetings, we devised a fox-proof chook house that fulfilled the following criteria:
1. Zero cost 
2. accessible for kids to let out/put chooks away/collect eggs 
3. FOX PROOF 
4. includes a run so we can go away for a night or 2 without having to organise for someone to come and lock up/let out chooks 
5. comfy for chooks.
Chook house almost complete
The house we made was kind of inspired by Milkwood's rawbale chook house, though we obviously didn't use bales. We did borrow their idea of having a mesh floor for ventilation in summer, which is covered in thick straw in winter. And the house is (obviously) raised off the ground to thwart that fox digging his or her way in. Walls are corrugated iron (bastard fox ain't gonna chew through that in a hurry), held up with bush poles from David's place, floor mesh came from some supermarket shelving that was being chucked out, all timber was scrap from other projects/salvaged from the tip, and the pen is made from mattress springs that are dug into the ground down to 40cm. We'll be planting passionfruit vines on either side, to climb on the mattresses to provide shade in the pen during summer. It took about 10 hours to build (4 hours with David's help), not including the time it took to dig the trenches for the mattresses and holes for the bush poles.
At the moment, we have 8 chickens living in it (John Howard (our breeding rooster), a rooster we'll be eating as soon as he starts to crow, Errol, and 5 laying hens), and I reckon that's about the limit. When we expand our flock to include commercial meat birds, we'll be building more pens a-la Joel Salatin. But for the purposes of the orchard, 8 chooks (and 11 ducks) is just fine.
The back door - for chook ingress/egress, egg collection and house-cleaning
All in all, the chooks seem to dig it, and we've had no evidence that the fox has been hanging around or trying anything out. It's easy for Olive to tend to her flock (especially Errol, who is currently preparing for the Far South Coast Annual Poultry Show), and, if I do say so myself, it's pretty good to look at. Though it seems to me you can't really go wrong with bush poles, old gal and beautifully rusted mattress springs...
View down the orchard showing swale to duck pond, chooks and chook house

Saturday, May 11, 2013

In praise of window-blankets

One of the things about a passive solar house, is that you need to make sure that the solar energy (heat) that you collect through your north-facing windows during the day, doesn't escape when the outside temperature drops in the evening. If you have money, you can get double, or even triple-glazed windows. If you're doing things on the cheapity-cheap, however, and found-on-the-side-of-the-road-2nd-hand-windows are more in your budget range, then you need to go to a plan B. Heavy curtains with pelmets are usually prescribed, but lining curtains can be expensive. We also wanted a solution that meant that the maximum amount of glass was open for heat-transfer during the day - we didn't want bunches of curtain at the sides of our windows, blocking out bits of heat. And then Pearl reported "something she'd seen somewhere" that was like a big curtain quilt, which was rolled up and hooked in the morning. Effectively, you end up with a rolled 'swag' kind of thing at the top of the window during the day, and your windows (and your toasty, solar-warmed rooms) are protected by nice big thick window quilts and blankets at night. Snug!
Patchwork-quilt 'swag' at the top of our french doors - lets through the maximum amount of light/heat during the day, keeps the cold out and heat in during the night
So far, we're thrilled with the results! The window-blankets were made using whatever we had to hand - old blankets, a patchwork quilt that was the perfect size for our french doors, and some beautiful beautiful doilies and appliques sent to us in a spectacular package from our friend Nicole.
And they're doing a fab-o job of keeping in the warmth, too.
We toyed with the idea of getting a small wood heater, earlier in the year. But when we did the measurements, we realised that we'd lose almost 2 square metres of floor space. Now, I'm sure there will be nights and rainy days this winter when we'll be longing for a bit of extra warmth. But I'm also sure that during the 10 months of the year when we don't need a fire, we'd be longing for the space inside our little house. So we made the call and decided to save the money, and the floor space, and just get some more jumpers and blankets to see us through the winter. She'll be right mate! But what it means is that our window-blankets and that solar energy we collect on our earth floor all through the day, are going to be super-precious as the days and nights get cooler. 
The kids' window
Many locals are still thinking we're a bit mad, living without any heating (other than the sun) through a Bega  winter, but we have faith in the sun, and we have faith in our bales and we now have faith in our window-blankets and extra jumpers and long underwear. Let's see how we go, shall we?
Lined double-blanket. It's also a nice way to show off bloody beautiful blankets like this one

Thursday, April 11, 2013

Hurrah for non-smokey firebaths!

Newly-enclosed fire bath a-fillin with the hose
As you may know, the Joys Of The Firebath have been some of our most pleasant surprises, since moving to our land. Firing up the bath and wallowing - perhaps with a beer, perhaps with some cheese and crackers, perhaps, even, with some dinner - for several hours of a weekend is an important, cleansing (literally and figuratively) and much-cherished ritual for our family.
 
Sure, we're still getting used to the whole shebang, and there are still things to learn (for example, the last 2 fires I've made have been a little too enthusiastic, so we've spent some time waiting for the water to cool down before we could get in, and even then, burning our bottoms a bit) but it's safe to say that we dig the fire bath.
The view: just one of the reasons we love our fire bath
One problem we have encountered as that on windy days smoke, and on particularly unfortunate occasions, ash, will blow up and whirl around when you're in the bath. Not super pleasant. My solution to this was to construct an enclosure around the bath and erect a chimney. Like pretty much everything we've done here, this is something I've never done before. Surprisingly, it worked! There are still a couple of little cracks that didn't quite seal properly, which I need to fix up, but it is a VAST improvement, and we're all pretty pleased with the results.
 
First, I erected the chimney (an off-cut of downpipe from the tip) and a 'frame' in the space that needed closing in using chicken wire and fencing wire and a few rocks.
Then, I cobbed the whole thing, using a straw (yep, we still have some left over) and concrete mix. I did a couple of layers of the concrete and straw, then a layer of just plain concrete.
This all took a little while, so by the time this bit was done, it was time to have another bath. it was nerve-wracking! Would the smoke go up the chimney? Would it all just billow out the fire-making hole? Maybe now the fire wouldn't get enough oxygen and wouldn't burn at all!??
 
Luckily, happily, here's what happened:
yessiree, that's smoke coming out the chimney (Oscar's small chimney can be seen at far right)
Hurrah!!
 
We enjoyed our bath that day, and marveled at the new smoke-and-ash-free experience.
 
Next up, decorations!
Being as live in a house where our washing up arrangements consist of a tub on our outside table and a 'draining board' that involved the bench seats of said table, and being as we live with 2 small and very active little kiddies, we have a lot of broken dishes. A lot. I save them all, because I have dreams of mosaicing things, and that's just what I did to the concrete-y fire-bath enclosure: On a beautiful, sunny day, Osky and I spent a glorious few hours glueing on all our broken bits of crockery, collected over the last few months, interspersed with a few other things like sea glass and the bottom of an old (1962) beer bottle that I found in the bush.

Oski: I couldn't have done it without him

Then we grouted the whole shebang, and our luxurious, enclosed fire bath is now complete! Well, we are planning on painting the chimney (Frida blue of course!) and I do need to block up the couple of leaky bits where whisps of smoke escape... But still!
 
Bonus feature is that the new enclosed bit is perfect for holding soap, shampoo bottles, beer, snacks, and, perhaps most importantly, toy horses all within easy reach of the recline position. I say: that's what you need in your life, innit?


Tuesday, March 19, 2013

"Is that a Leona Edmiston?"

Recently, I made my little sister Meggy a frock-&-bolero set for a wedding, which she went to last weekend. As you can see, she looked freakin' gorgeous. The wedding was in the mountains, and celebrated the love between her 2 good friends, Hev and Nibs. Yay love! Yay handmade-and-nature-inspired weddings!
Yay love!
As you may know, if you know me or you've been reading this blog for a while, I'm pretty into weddings. I love the party, I love the fact that they get people feeling all out and proud about love, and I love the opportunity to get hands-on with any and all varieties of wedding-related craft activities including (but not limited to) wedding dresses, bridesmaids dresses, and wedding bunting.
Even though I've never actually met Hev and Nibs, I was more than happy to make a frock for Meg (in exchange, she's going to lend us her superb tree-plating skills this Easter holidays) for their wedding, and help out with the little statues that adorned their wedding cake. And what a cake it was! 
Well, unfortunately I didn't actually taste the cake, but it sure looks good, right?? And I reckon it looks even better when you hear that it was made in the mountains, using organic and fair trade chocolate. Niiice...
Now. The dress. The green fabric came from a shop in Cabramatta (an excellent location if you're in the market for new fabric for wedding and/or other fancy kinds of frocks ('twas where we purchased materials for Pearl's and my wedding frocks, and Meg's year 12 formal frock). The bolero fabric - which is nothing short of STUNNING - came out of the nurse's quarters at Temorah hospital, where Meg's super-spunky and uber-lovely boyfriend, Jerry, works as a nurse. It's vintage, giant yellow-and-pink-rose-print barkcloth. Yum. Meg also used it to cover the giant button on the front of her dress, so it's all nice and matchy-match.
Jerry the nurse-cum-fabric-supplier on the left, Meg and matchy curtain adornments on the right
In all, the outfit was a success! Meg looked - and more importantly felt - "pretty much amazing" in the outfit. Someone even asked her if it was a Leona Edmiston! I'm taking this as a compliment, though I don't go in for designer threads much myself. But I suppose as far as designer threads go, Leona does design some pretty wares. Though I doubt she'd do a trade for some help with planting out a shelter belt, and I can guaran-damn-tee her stuff isn't made at an outside table, under beautiful late-summer blue skies, on a machine powered wholly by the sun.